블로그 이미지
LifeisSimple

calendar

1 2 3 4 5 6
7 8 9 10 11 12 13
14 15 16 17 18 19 20
21 22 23 24 25 26 27
28 29 30

Notice

2012. 2. 14. 09:48 Brain Trainning/DataBase
2012 Active/Active Cluster 구성하는 방법이네요... 

http://www.sqlservercentral.com/articles/SQL+Server+2012/86920/ 

SQL Server 2012 Active/Active Cluster in Hyper-V

By Paul Brewer, 2012/02/13

Total article views: 2552 | Views in the last 30 days: 2552

There are a few reasons you might want a virtual, Active/Active SQL Server 2012 Cluster. These might include:

  • Rather than dynamic and ever expanding VM's or static VM's always under resource pressure, offload the database and log files to a dedicated file server. Alleviate disk pressure from the Hyper V host
  • To simulate scenario's and test changes prior to making change in production.
  • Self development and training - My motive here.
  • Virtual clustering of Windows Server and SQL Server offers the high availability of clustering with the managability of virtualization.

The diagram below shows one possible configuration, used here, but there are many other possibilities.

 A SAN is hosted on a dedicated file server where the iSCSI Target is serving the following disk resources to the 2 cluster servers:

  • SQL Log 1 - Logs for 1st SQL cluster service
  • SQL Data 1 - Data for 1st SQL cluster service
  • SQL Log 2 - Logs for 2nd SQL cluster service
  • SQL Data 2 - Data for 2nd SQL cluster service
  • Quorum - For the Windows Cluster Service

A domain controller is providing Active Directory services. The 4 servers above are virtual and hosted in Hyper-V.

HYPER V

The Hyper V host has 8 GB of RAM, 8 processors. Resources are granted to the VM's as follows:

  • Domain Controller – 1 GB RAM, 1 CPU
  • File Server – 1 GB RAM, 1 CPU
  • Cluster Server 1 – 2 GB RAM, 2 Processors
  • Cluster Server 2 – 2 GB RAM, 2 Processors

Three virtual networks were created as follows:

ServerName

Role

LAN

SANNET

ClusterPing

GSPIT002A-DC

Domain Controller

192.168.1.80

GSPIT002A-CD

iSCS SAN

192.168.1.85

10.10.10.10

GSPIT002A-CL1

Cluster 1

192.168.1.86

10.10.10.11

192.168.0.1

GSPIT002A-CL2

Cluster 2

192.168.1.87

10.10.10.12

192.168.0.2

In the real world, NIC's might be teamed and there would probably be a dedicated network for backup and TempDB. I'm honestly not sure whether it would be worth hosting TempDB on a dedicated drive or not. All data IO is over TCP and iSCSI with this all occurring within a virtual virtual network using virtual storage so in this case I don't think so.

The following actions then need to be performed but describing the steps is beyond the scope of this but there is plenty of good reference material available.

  • Installing and configuring Windows Server 2008 R2 on a Hyper-V VM, apply patches
  • Sysprep the image
  • Create 3 new VM's from the image
  • Promote 1 to a domain controller
  • Add the other servers to the domain
  • Ensure network settings on servers are as above.

Configure the SAN Storage on the VM's

Clustering relies on a SAN and the Microsoft iSCSI Target can be downloaded for free here: http://www.microsoft.com/download/en/details.aspx?id=19867 and used to create the necessary shared storage.

Install the iSCSI Target on file server GSPIT002A-CD. First create the iSCSI Targets as below:


Then create and assign Devices (Drives) for the iSCSI Target as below:


You need to specify which initiators have permission to the iSCSI Target as below:

Then, right click and disable all but the Quorum iSCSI target, as below:


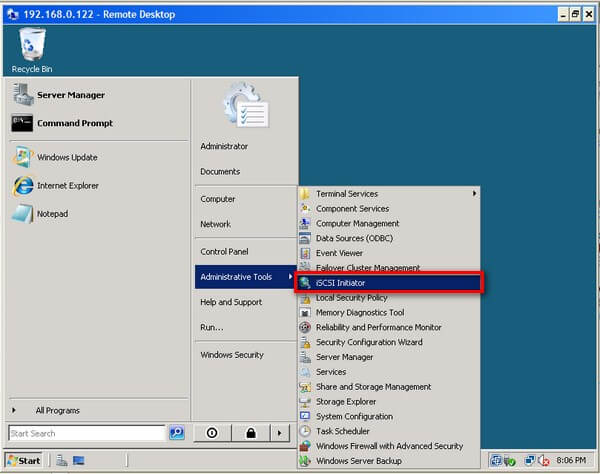
The iSCSI Initiator is part of Windows Server 2008 so no download is required to configure the cluster iSCSI clients.

Check The 'Initiator Name' of intiaitors as below:


This is needed by the iSCSI Target for permissions.

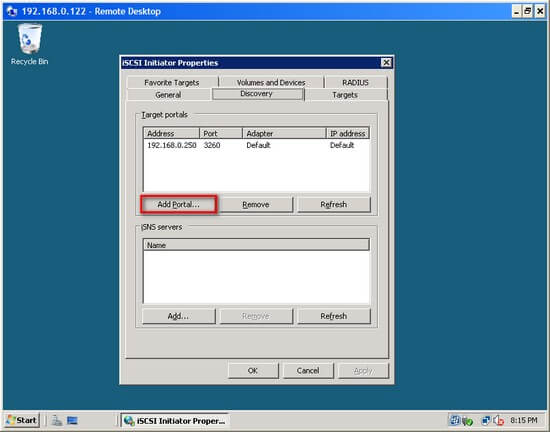
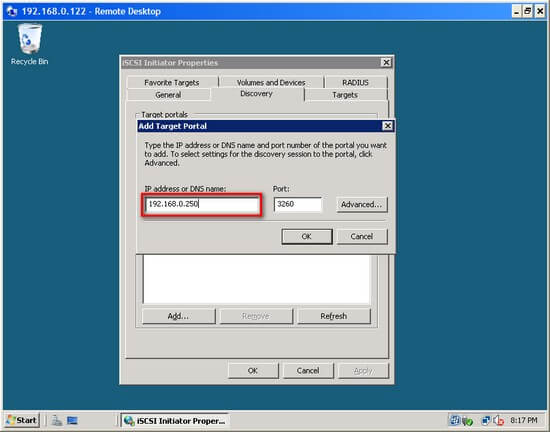
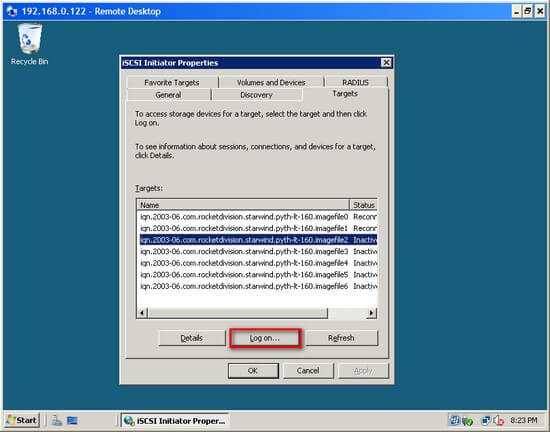
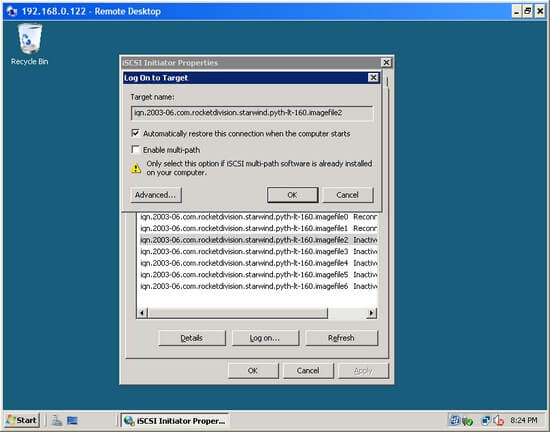
Point the iSCSI Initiator at the iSCSI Target as below:


Once the iSCSI Initiator and Target are communicating properly, there is a 'Refresh' button in the 'Discovery' tab and 'Auto Configure' button in the 'Volumes and Devices' tab that make the rest easy.

Configure Windows Clustering

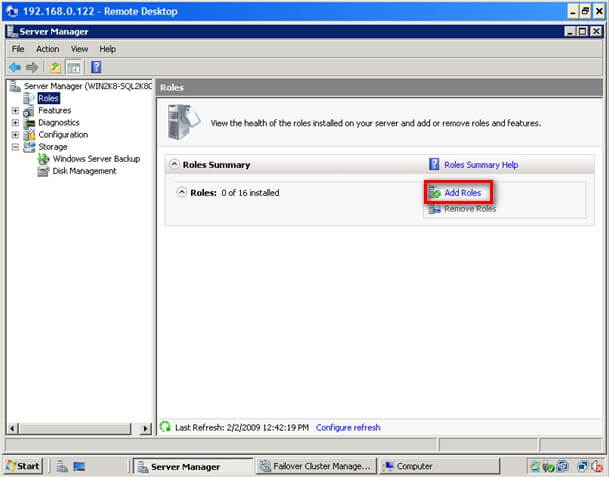
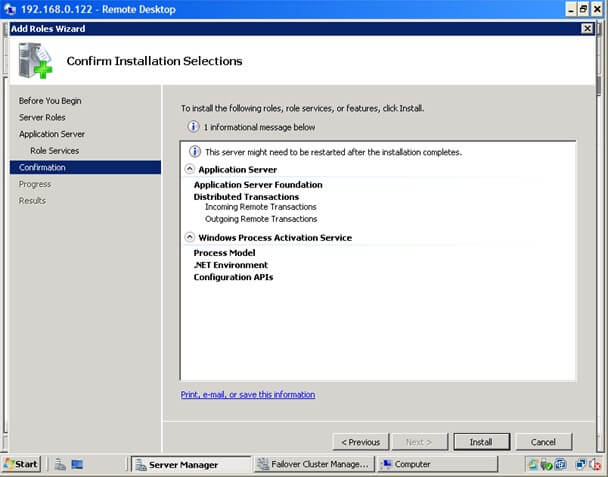
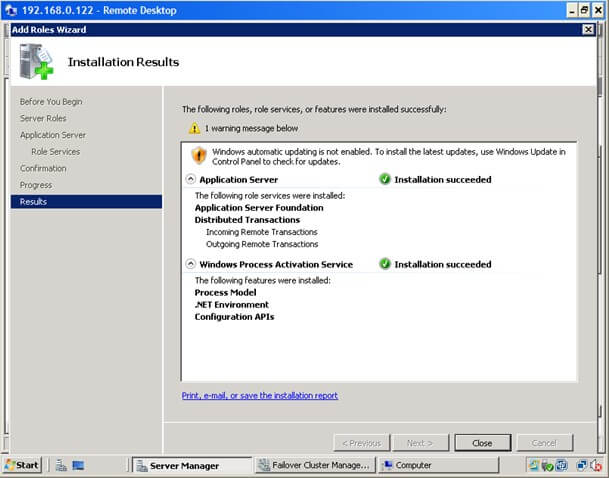
You now need to connect to the clustered server VM's and configure Windows Clustering. First install the 'Failover Clustering' feature on both cluster servers, also install the '.NET Framework 3.5.1 features' too.

Next, mount the Quorum drive using the server 'Disk Manager' as below, right clicking Disk 3 and 'Online':


This can be done on either of the servers that are about to be clustered. Change the Drive letter to 'Q' and rename the volume 'Quorum'

Next, start the 'Administrator' - 'Failover Cluster Manager' snapin and run the 'Validate a Configuration Wizard' to check the setup. This needs to be spot on as if Windows Clustering isn't working, SQL Cluster Services will not work either. Ensure a full set of ticks on the cluster validation wizard before launching the clustering wizard to actually create the cluster. Don't be scared to evict servers from the cluster, destroy the cluster, delete cluster object in Active Directory Computers container, remove then add the cluster feature from servers until you get it spot on.

Use the following settings during the cluster installation:


Install two SQL SERVER 2012 Active/Active cluster nodes

For both Servers, as a prerequisite, install the .NET Framework 3.5.1 Features.

Install first clustered SQL Instance:

  1. GSPIT002A-CD -On the file server GSPIT002A-CD, enable the iSCSI Target iSCSI Target 'SQL1'.
  2. GSPIT002A-CL1 - 'Refresh Targets', 'Connect' and 'Auto-Configure volumes and Devices'
  3. GSPIT002A-CL1 - Using the 'Device Manager', the same same way as the Quorum drive, 'Bring Disks Online', assign Drive Letters and Volume Names
  4. GSPIT002A-CL1 - SQL Installation Media / Create New Failover Cluster Installation (Service = SQL-CL1, Instance = I1)
  5. GSPIT002A-CL2 - On the second server - SQL Installation Media / Add as node to existing Cluster

Install second clustered SQL Instance:

  1. GSPIT002A-CD -On the file server GSPIT002A-CD, enable the iSCSI Target iSCSI Target 'SQL2'.
  2. GSPIT002A-CL2 - 'Refresh Targets', 'Connect' and 'Auto-Configure volumes and Devices'
  3. GSPIT002A-CL2 - Using the 'Device Manager' 'Bring Disks Online', assign Drive Letters and Volume Names
  4. GSPIT002A-CL2 - SQL Installation Media / Create New Failover Cluster Installation (Service = SQL-CL2, Instance = I2)
  5. GSPIT002A-CL2 - On the first server - SQL Installation Media / Add as node to existing Cluster

I didn't actually reference any blogs to do this and went with a Next, Next, Next approach at the installation wizard. If you are careful, set service accounts, database file locations etc carefully, its straight forward. The sequence of steps to perform actions in was the most difficult aspect which is why the two simple 1...5 lists above are perhaps the best documentation. You should at this point have a fully functioning Active /Active SQL Server 2012 cluster up and running.

Jose Barret blog on iSCSI setup, my primary reference resource in this project.
http://blogs.technet.com/b/josebda/archive/2011/04/04/microsoft-iscsi-software-target-3-3-for-windows-server-2008-r2-available-for-public-download.aspx

posted by LifeisSimple
2012. 2. 8. 00:23 Brain Trainning/Server
Failover Cluster Step-by-Step Guide - Configuring a Two-Node File Server Failover Cluster 

클러스터 예제 관련 파일입니다. 파일서버지만 클러스터 개념은 동일해서 따라하기 괜찮습니다. 

시퀄 클러스터는 요책이 좋습니다. 개인적으로는 ㅎㅎㅎ PDF로 소장중입니다. 

Pro SQL Server 2008 Failover Clustering (Expert's Voice in SQL Server)


ProSQLServer2008FailoverClustering
카테고리 과학/기술 > 컴퓨터
지은이 Hirt, Allan (Springer, 1900년)
상세보기


posted by LifeisSimple
2010. 11. 26. 22:40 Brain Trainning/DataBase

출처 : http://www.mssqltips.com/tip.asp?tip=1687

Installing SQL Server 2008 on a Windows Server 2008 Cluster Part 1

Written By: Edwin Sarmiento -- 2/13/2009 -- read/post comments -- print -- Bookmark and Share 

Rating:  Rate 

Problem
In a previous tip on SQL Server 2008 Installation Process, we have seen how different SQL Server 2008 installation is from its previous versions. Now, we have another challenge to face: installing SQL Server 2008 on a Windows Server 2008 Cluster. Windows Server 2008 has a lot of differences from its previous versions and one of them is the clustering feature. How do I go about building a clustered SQL Server 2008 running on Windows Server 2008?

Solution
There have been a lot of changes regarding clustering between Windows Server 2003 and Windows Server 2008. It took quite a lot of effort for us to build a cluster in Windows Server 2003 - from making sure that the server hardware for all nodes are cluster-compatible to creating resource groups. Microsoft has redefined clustering with Windows Server 2008, making it simpler and easier to implement. Now that both SQL Server 2008 and Windows Server 2008 are out in the market for quite some time, it would be a must to prepare ourselves to be able to setup and deploy a clustered environment running both. Installing SQL Server on a stand-alone server or member server in the domain is pretty straight-forward. Dealing with clustering is a totally different story. The goal of this series of tips is to be able to help DBAs who may be charged with installing SQL Server on a Windows Server 2008 cluster.

Prepare the cluster nodes

I will be working on a 2-node cluster throughout the series and you can extend it by adding nodes later on. You can do these steps on a physical hardware or a virtual environment. I opted to do this on a virtual environment running VMWare. To start with, download and install a copy of the evaluation version of Windows Server 2008 Enterprise Edition. This is pretty straight-forward and does not even require any product key or activation. Evaluation period runs for 60 days and can be extended up to 240 days so you have more than enough time to play around with it. Just make sure that you select at least the Enterprise Edition during the installation process and have at least 12GB of disk space for your local disks. This is to make sure you have enough space for both Windows Server 2008 and the binaries for SQL Server 2008. A key thing to note here is that you should already have a domain on which to join these servers and that both have at least 2 network cards - one for the public network and the other for the heartbeat. Although you can run a cluster with a single network card, it isn't recommend at all. I'll lay out the details of the network configuration as we go along. After the installation, my recommendation is to immediately install .NET Framework 3.5 with Service Pack 1 and Windows Installer 4.5 (the one for Windows Server 2008 x86 is named Windows6.0-KB942288-v2-x86.msu). These two are prerequisites for SQL Server 2008 and would speed up the installation process later on.

Carve out your shared disks

We had a lot of challenges in Windows Server 2003 when it comes to shared disks that we will use for our clusters. For one, the 2TB limit which has a lot to do with the master boot record (MBR) has been overcome by having the GUID Partition Table (GPT) support in Windows Server 2008. This allows you to have 16 Exabytes for a partition. Another has been the use of directly attached SCSI storage. This is no longer supported for Failover Clustering in Windows Server 2008. The only supported ones will be Serially Attached Storage (SAS), Fiber Channel and iSCSI. For this example, we will be using an iSCSI storage with the help of an iSCSI Software Initiator to connect to a software-based target. I am using StarWind's iSCSI SAN to emulate a disk image that my cluster will use as shared disks. In preparation for running SQL Server 2008 on this cluster, I recommend creating at least 4 disks - one for the quorum disk, one for MSDTC, one for the SQL Server system databases and one for the user databases. Your quorum and MSDTC disks can be as small as 1GB, although Microsoft TechNet specifies a 512MB minimum for the quorum disk. If you decide to use iSCSI as your shared storage in a production environment, a dedicated network should be used so as to isolate it from all other network traffic. This also means having a dedicated network card on your cluster nodes to access the iSCSI storage.

Present your shared disks to the cluster nodes

Windows Server 2008 comes with iSCSI Initiator software that enables connection of a Windows host to an external iSCSI storage array using network adapters. This differs from previous versions of Microsoft Windows where you need to download and install this software prior to connecting to an iSCSI storage. You can launch the tool from Administrative Tools and select iSCSI Initiator.

To connect to the iSCSI target:

  1. In the iSCSI Initiator Properties page, click on the Discovery tab.

  2. Under the Target Portals section, click on the Add Portal button.
  3. In the Add Target Portal dialog, enter the DNS name or IP address of your iSCSI Target and click OK. If you are hosting the target on another Windows host as an image file, make sure that you have your Windows Firewall configured to enable inbound traffic to port 3260. Otherwise, this should be okay.


  4. Back in the iSCSI Initiator Properties page, click on the Targets tab. You should see a list of the iSCSI Targets that we have defined earlier


  5. Select one of the targets and click on the Log on button.
  6. In the Log On to Target dialog, select the Automatically restore this connection when the computer starts checkbox. Click OK.

  7. Once you are done, you should see the status of the target change to Connected. Repeat this process for all the target disks we initially created on both of the servers that will become nodes of your cluster.

Once the targets have been defined using the iSCSI Initiator tool, you can now bring the disks online, initialize them, and create new volumes using the Server Manager console. I won’t go into much detail on this process as it is similar to how we used to do it in Windows Server 2003, except for the new management console. After the disks have been initialized and volumes created, you can try logging in to the other server and verify that you can see the disks there as well. You can rescan the disks if they haven’t yet appeared.

Adding Windows Server 2008 Application Server Role

Since we will be installing SQL Server 2008 later on, we will have to add the Application Server role on both of the nodes. A server role is a program that allows Windows Server 2008 to perform a specific function for multiple clients within a network. To add the Application Server role,

  1. Open the Server Manager console and select Roles.
  2. Click the Add Roles link.  This will run the Add Roles Wizard

  3. In the Select Server Roles dialog box, select the Application Server checkbox. This will prompt you to add features required for Application Server role. Click Next.

  4. In the Application Server dialog box, click Next.

  5. In the Select Role Services dialog box, select Incoming Remote Transactions and Outgoing Remote Transactions checkboxes. These options will be used by MSDTC. Click Next

  6. In the Confirm Installation Selections dialog box, click Install. This will go thru the process of installing the Application Server role

  7. In the Installation Results dialog box, click Close. This completes the installation of the Application Server role on the first node. You will have to repeat this process for the other server

We have now gone thru the process of creating the cluster at this point. In the next tip in this series, we will go thru the process of installing the Failover Cluster feature, validating the nodes that will become a part of the cluster and creating the cluster itself. And that is just on the Windows side. Once we manage to create a working Windows Server 2008 cluster, that's the only time we can proceed to install SQL Server 2008.

Next Steps

  • Download and install an Evaluation copy of Windows Server 2008 for this tip
  • Start working on building your test environment in preparation for building a SQL Server 2008 cluster on Windows Server 2008
  • Read Part2, Part3 and Part4 

Readers Who Read This Tip Also Read

posted by LifeisSimple
2010. 9. 29. 11:09 Brain Trainning/DataBase

MySQL Clustering Config

Posted October 6, 2008
Filed under:
 Uncategorized | Tags: cluster, Clustering, MySQL |

I’ve had two positive comments to my previous post so I figured it was time to write an update regarding how my work has been going.

The MySQL clustered database is part of a large project I’ve been working on for the last 2 months. The basic server setup is two clustered JBoss 4.2.3Application Servers running on top of two clustered MySQL 5.0.67 servers. There is a 3rd Server which is a backup which currently only runs the MySQL manager ment console. I’ve noticed that even if there is high load on the 2 NDB data nodes, the Management console does not do much.

The four main servers run 2 Dual-Core AMD Opteron(tm) Processors with 8 gig of ram.

Even though alot of my work has been to rework my own code in order to optimize and improve it, alot of time has been spent looking for a configuration for the MySQL cluster that would cope with the load as I found that it was quite easy to kill the cluster in the beginning.

The config I am currently using is below and following are some results of the load testing I’ve been doing.

[TCP DEFAULT]

SendBufferMemory=2M

ReceiveBufferMemory=2M


[NDBD DEFAULT]

NoOfReplicas=2


# Avoid using the swap

LockPagesInMainMemory=1


#DataMemory (memory for records and ordered indexes)

DataMemory=3072M


#IndexMemory (memory for Primary key hash index and unique hash index)

IndexMemory=384M


#Redolog

# (2*DataMemory)/64MB which is the LogFileSize for 5.0

NoOfFragmentLogFiles=96


#RedoBuffer of 32M. If you get "out of redobuffer" then you can increase it but it

#more likely a result of slow disks.

RedoBuffer=32M


MaxNoOfTables=4096

MaxNoOfAttributes=24756

MaxNoOfOrderedIndexes=2048

MaxNoOfUniqueHashIndexes=512


MaxNoOfConcurrentOperations=1000000


TimeBetweenGlobalCheckpoints=1000


#the default value for TimeBetweenLocalCheckpoints is very good

TimeBetweenLocalCheckpoints=20


# The default of 1200 was too low for initial tests. But the code has been improved alot

# so 12000 may be too high now.

TransactionDeadlockDetectionTimeout=12000

DataDir=/var/lib/mysql-cluster

BackupDataDir=/var/lib/mysql-cluster/backup


[MYSQLD DEFAULT]


[NDB_MGMD DEFAULT]


# Section for the cluster management node

[NDB_MGMD]

# IP address of the management node (this system)

HostName=10.30.28.10


# Section for the storage nodes

[NDBD]

# IP address of the first storage node

HostName=10.30.28.11


[NDBD]

# IP address of the second storage node

HostName=10.30.28.12


# one [MYSQLD] per storage node

[MYSQLD]

[MYSQLD]


Here are some numbers of what I’ve been able to get out of the MySQL cluster. One iteration of my code results in:
12 selects
10 inserts
10 updates
4 deletes
This might sound like a lot, but it is a service oriented application that relies on persistent JBoss queues and demands
 100% redundancy so even if the server dies, it will pickup where it died and does not loose any data.

My first benchmark was 10 000 iterations which is the current load I can expect on the application over the course of an hour i.e.
12 000 selects
10 000 inserts
10 000 updates
4 000 deletes
This took a total of
 93 seconds producing just over 100 iterations per second.

The second test to really put the application and environment to the test was to run 100 000 iterations. This test completed in roughly 15 minutes producing around 110 iterations per second. This is about 10x the load we’d expect to see during the course of one hour but it is nice to see the setup has the ability to grow quite a bit before we need more hardware. :)

I am currently working on setting up a third test which will run 100 000 iterations every hour for 10 hours producing 1 millions rows of data.


Possibly related posts: (automatically generated)

·         I’m half way to being MySQL certified

·         Oracle buying Sun, therefore adquiring MySQL!!!!!

·         Tips & Tricks from MySQL Experts


 출처 : http://bieg.wordpress.com/2008/10/06/mysql-clustering-config/

'Brain Trainning > DataBase' 카테고리의 다른 글

SQL Diag 이렇게 이용  (0) 2010.10.16
SQL Server 2008 SP2 (서비스팩2)  (0) 2010.10.04
MySQL Clustering on Ubuntu  (0) 2010.09.29
MySQL Cluster 구성  (0) 2010.09.20
유지관리 - 흔적삭제  (0) 2010.09.13
posted by LifeisSimple
2010. 9. 29. 10:56 Brain Trainning/DataBase

MySQL Clustering on Ubuntu

Posted August 3, 2008
Filed under:
 Clustering, MySQL, Uncategorized |

I spent some time getting MySQL clustering working with Ubuntu after reading a guide on Howto Forge. The guide however went into the details of compiling and installing MySQL from source so I’m creating this to show the steps needed to get it set up on a fresh Ubuntu installation.

For a correct setup you will need 3 machines. The first machine will serve as the management node, and the other two will be storage nodes.

At the time of writing, the current stable version of Ubuntu is 8.04.1 and the MySQL version that is installed is 5.0.51

During the configuration I log onto the machines and use the command

sudo su -

to gain permanent root access and saving myself from having to type sudo in front of every command. Use your own discretion.

Installing MySQL

Using apt this is straight forward. Just type the following command on all three machines to install MySQL server.

apt-get install mysql-server

Once asked to, set the root password to the MySQL database. You’ll need to remember this one. Once MySQL server is installed we’ll proceed to configure the management node.

Configuring the Management Node

Create and edit the file /etc/mysql/ndb_mgmd.cnf. Copy and paste the text bellow changing the ip addresses to match your setup as necessary.

[NDBD DEFAULT]

NoOfReplicas=2

DataMemory=80M    # How much memory to allocate for data storage

IndexMemory=18M   # How much memory to allocate for index storage

# For DataMemory and IndexMemory, we have used the

# default values. Since the "world" database takes up

# only about 500KB, this should be more than enough for

# this example Cluster setup.

[MYSQLD DEFAULT]

[NDB_MGMD DEFAULT]

[TCP DEFAULT]

# Section for the cluster management node

[NDB_MGMD]

# IP address of the management node (this system)

HostName=192.168.1.5


# Section for the storage nodes

[NDBD]

# IP address of the first storage node

HostName=192.168.1.6

DataDir=/var/lib/mysql-cluster

BackupDataDir=/var/lib/mysql-cluster/backup

DataMemory=512M

[NDBD]

# IP address of the second storage node

HostName=192.168.1.7

DataDir=/var/lib/mysql-cluster

BackupDataDir=/var/lib/mysql-cluster/backup

DataMemory=512M


# one [MYSQLD] per storage node

[MYSQLD]

[MYSQLD]

Configuring the Storage Nodes

As you can see in the file we created in the previous step, the cluster will be using/var/lib/mysql-cluster on the storage machines. This path is created when you install MySQL server but they are owned by root. We want to create the backup directory and change ownership to mysql.

mkdir /var/lib/mysql-cluster/backup

chown -R mysql:mysql /var/lib/mysql-cluster

Now we’ll need to edit the MySQL configuration so that the storage nodes will communicate with the Management Node.

Edit /etc/mysql/my.cnf

Search for [mysqld] and add the following.

[mysqld]

ndbcluster

# IP address of the cluster management node

ndb-connectstring=192.168.1.5

Then scroll down to the bottom until you see [MYSQL_CLUSTER]. Uncomment the line and edit so it looks like

[MYSQL_CLUSTER]

ndb-connectstring=192.168.1.5

The reason the connect string it found twice in the mysql file is because one is used by mysql server, and the other is used by the ndb data node app. Save the changes to the file.

Make sure you complete the changes on both data nodes.

Start the Management Node

Start the Management Node using

/etc/init.d/mysql-ndb-mgm restart

The process shouldn’t be running but using restart doesnt hurt. Once it is started we can access the management console using the command ndb_mgm. At the prompt type show; and you will see

ndb_mgm> show;

Connected to Management Server at: localhost:1186

Cluster Configuration

---------------------

[ndbd(NDB)]    2 node(s)

id=2 (not connected, accepting connect from 192.168.1.6)

id=3 (not connected, accepting connect from 192.168.1.7)


[ndb_mgmd(MGM)]    1 node(s)

id=1    @192.168.1.5  (Version: 5.0.51)


[mysqld(API)]    2 node(s)

id=4 (not connected, accepting connect from any host)

id=5 (not connected, accepting connect from any host)

As you can see the management node is waiting for connections from the data nodes.

Start the Data Nodes

On the data nodes, issue the commands

/etc/init.d/mysql restart

/etc/init.d/mysql-ndb restart

Go back to the management node, type show; again, and now you should see something similar to

id=2    @192.168.1.6  (Version: 5.0.51, starting, Nodegroup: 0)

id=3    @192.168.1.7  (Version: 5.0.51, starting, Nodegroup: 0)

Once they have started properly, the show command should display

ndb_mgm> show;

Cluster Configuration

---------------------

[ndbd(NDB)]    2 node(s)

id=2    @192.168.1.6  (Version: 5.0.51, Nodegroup: 0, Master)

id=3    @192.168.1.7  (Version: 5.0.51, Nodegroup: 0)

[ndb_mgmd(MGM)]    1 node(s)

id=1    @192.168.1.5  (Version: 5.0.51)

[mysqld(API)]    2 node(s)

id=4    @192.168.1.7  (Version: 5.0.51)

id=5    @192.168.1.6  (Version: 5.0.51)

Congratulations, your cluster is now setup.

Testing the cluster

Issue the following on both data nodes to create the test database. Since clustering is done on a table basis in MySQL we have to create the database manually on both data nodes.

$> mysql -u root -p

Enter password:

Welcome to the MySQL monitor.  Commands end with ; or \g.

Your MySQL connection id is 8

Server version: 5.0.51a-3ubuntu5.1 (Ubuntu)


Type 'help;' or '\h' for help. Type '\c' to clear the buffer.


mysql> create database clustertest;

Query OK, 1 row affected (0.00 sec)

Once this i done, on ONE of the data nodes, create a test table and add an entry.

mysql> use clustertest;

Database changed

mysql> create table test (i int) engine=ndbcluster;

Query OK, 0 rows affected (0.71 sec)


mysql> insert into test values (1);

Query OK, 1 row affected (0.05 sec)


mysql> select * from test;

+------+

| i    |

+------+

|    1 |

+------+

1 row in set (0.03 sec)

We’ve just created a table test, added a value to this table and made sure that the table contains one entry. Note that engine=ndbcluster must be used to let MySQL know that this table should be clustered among the data nodes. Let’s make sure that the table is infact created on the other data node, and contains one entry.

mysql> use clustertest;

Reading table information for completion of table and column names

You can turn off this feature to get a quicker startup with -A


Database changed

mysql> show tables;

+-----------------------+

| Tables_in_clustertest |

+-----------------------+

| test                  |

+-----------------------+

1 row in set (0.01 sec)


mysql> select * from test;

+------+

| i    |

+------+

|    1 |

+------+

1 row in set (0.04 sec)

As you can see, the cluster is working.

Moving an existing database to the cluster

Now that we have the cluster working, we can easily change an existing database to be clustered. All you need to do is run the following command on each of the tables.

alter table my_test_table engine=ndbcluster;

The table, and all it’s data will be copied to the datanodes and you can now access/change then through any nodes in the cluster. Very simple.


Possibly related posts: (automatically generated)

·         How to fix forgotten MySql passwords in Ubuntu

·         How to set or reset password mysql on Ubuntu

·         Ebooks on MySQL


'Brain Trainning > DataBase' 카테고리의 다른 글

SQL Server 2008 SP2 (서비스팩2)  (0) 2010.10.04
MySQL Clustering Config  (0) 2010.09.29
MySQL Cluster 구성  (0) 2010.09.20
유지관리 - 흔적삭제  (0) 2010.09.13
Brad M. McGehee SQL Presentations  (0) 2010.09.08
posted by LifeisSimple
prev 1 next